Thursday, December 30, 2010

Prepping For Paint

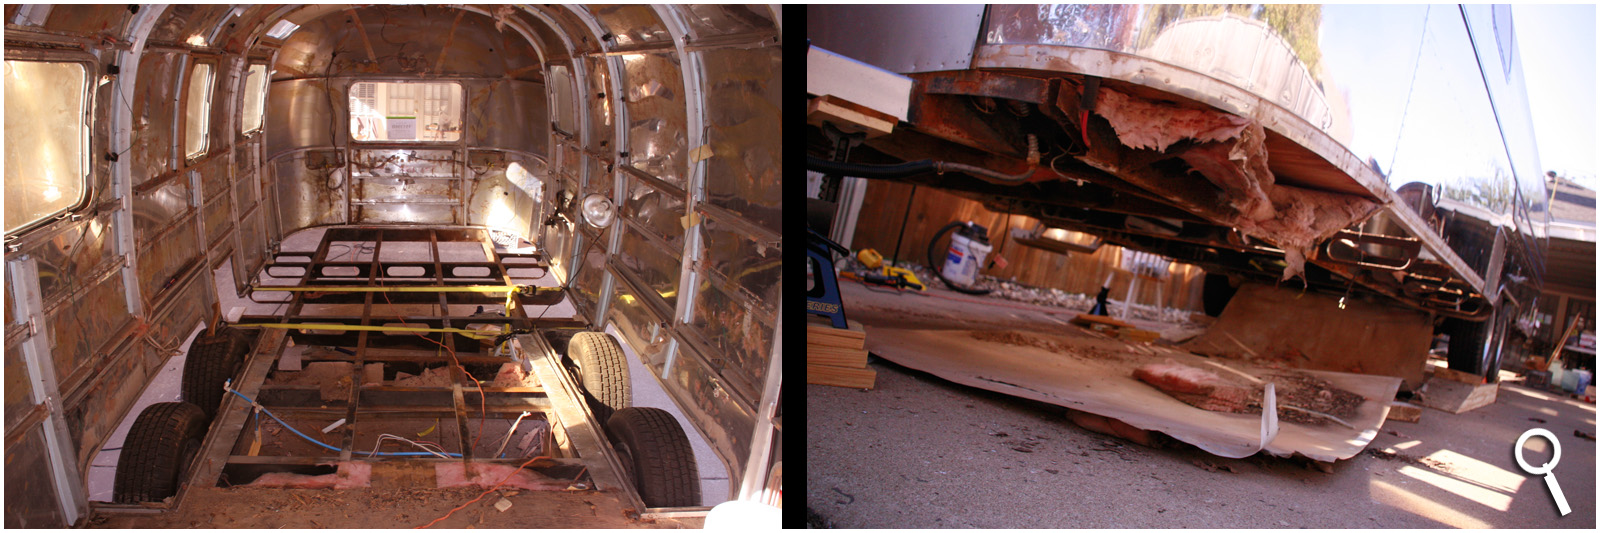
It's been cold last few days. Running an oil heater in the Airstream but not doing much good without a floor to contain the heat. On wire brushing detail - removing rust and old paint. Found out about a product called POR-15 which is some space age paint that creates an amazingly hard coating around metal. It's so gnarly that I have to put duct tape on the rim of the paint can because if any of the product gets on the lip, you'll never get the lid off next time. Oh and, if you get it on you and it dries just a little . . . you'll be wearing it for days! Hoping to get the new floor in this weekend and then it will really feel like we've turned the corner on getting Casita back together. Hope I don't have any bolts left over! LOL.

Brand New [Old] Frame!

Welder came a second day and we finished up with reinforcing the frame. We added all new Outriggers [the pieces of steel that look somewhat wing-like on the outermost part of the frame] as well as angle in places that were weakened with rust - primarily in the rear section as seen in this photo. We also added the carrier for the propane tanks that will rest on the tongue.

Friday, December 24, 2010

Old Axles Out and Welder Came Today

Here's the old axles in the back of my truck. They weren't too bad to get out. It's amazing that each one is only held together with four bolts. Guess that means the Airstream is riding on eight bolts! Yikes! The main tubes are bent by a machine so the wheels are cambered properly.


Welder came and did repair work on frame. Some areas were badly rusted and needed some help. More welding on frame after Christmas and to attach the rack where the propane tanks will rest on the tongue.

Sunday, December 19, 2010

Floor Removal

Getting down to the nitty gritty now! Just finished getting the old flooring torn out as well as removing the aluminum underside known as the 'Belly Pan'. All that's left is the shell, frame, axles and wheels. You can see the old, funky pink insulation hanging down. Doubt it had much R-value left! Lots of rust, dust and mouse droppings. Argh! I'm using yellow cargo straps to help keep the shell from popping off the frame. Here, Jennifer is waterproofing plywood for the new floor.


Today, I'm dropping the old axles so we can take them in, get measured and order new ones. Tomorrow I have a welder named David Bliss of Bliss Fabrications coming over to help me re-fortify the frame. Then new flooring. Phew! Lotta work!

Saturday, December 11, 2010

Exterior Mirror By Jennifer

Jennifer has been goin' to town on polishing the Airstream. You can see the difference by comparing the bottom where she is working to the top that is still oxidized and dirty. Go Jennifer!!

No, she's not polishing the entire thing by hand! She is using an orbital polisher but doing some detail work here-and-there by hand. Click on the pix to see them enlarged - then click your back button to return to blog.

Tuesday, December 7, 2010

Homemade Tandem Wheel Ramps

I purchased some 2" x 12" lumber and custom built a pair of wheel ramps so I can get the Airstream up high enough to work under it comfortably. Jen and I pulled 'er up yesterday and I also located six jack stands around the frame and tongue for added safety. Using a crawler, I rolled up under and began removing rivets and screws so I could pull off the belly pan [aluminum sheeting used to cover the underside of the trailer]. It has holes and open areas, so needs replacing. I pulled more pink insulation out and will replace with a rigid board type insulation.

Monday, December 6, 2010

Torsion Axles - Out With The Old, In With The New

I recently discovered that after 31 years of faithful service, our axles are shot and need replacing. In addition, I've pulled up some sub flooring to inspect the frame and found it's pretty rusty in most places. I'll use a grinder with wire brush and probably rent a sand blaster to clean it up, then prep and paint it After, new plywood sub flooring. Yikes, so this is ending up being a complete 'from the ground up' restoration which we didn't anticipate when we first bought her. On the bright side, when finished, we'll virtually have a brand new Airstream! And as Jennifer puts it, I'll be very intimate with Casita which I like because now I will know her inside and out and when any future repairs come up, I'll know exactly where to look, what to do and will have the tools to do it.

Old Wiring Tear Out

Getting down to the end of the last bit of tear out. There are three separate wiring systems in Airstreams: 1] The wiring harness for running and tail lights, 2] A 12 volt DC system and 3] a 110 volt AC system. I tore out the AC and DC wiring which is this heaping mess as seen here.

I've already started drafting wiring diagrams for new systems which I'm actually looking forward to installing.

New Door Lock and Insulation


Our neighbor Jerry Reese was kind enough to donate a Lowes gift card toward our Airstream renovation, so used it to purchase materials to fix our front door. Thank you Jerry!! When we bought Casita, the door was being held closed by one small screw. Where the door opener/lock used to be was this ugly, gaping hole. I bought a new lock and installed it, along with adding insulation and brown Masonite for the interior. I also scraped off and replaced the old weather stripping. Lookin' good now! I also bought a dead bolt that still needs installing.